- Video for Introduction to Process Hazard Analysis
- Video for What-If PHA Automated Excel Spreadsheet
- Chemical Safety Board Videos
- Standards for Conducting a PHA
- PHA Sample using What-If Methodology
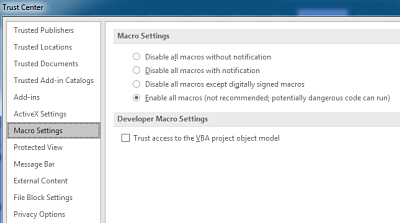
- Verify System Requirements and Enable Macros.
Excel Version 2016 or Newer is required. Mac users may deploy on Parallels Desktop for Mac, vmWare, or similar Windows application hosting environment. The Excel Trust Center may be configured to trust a Publisher, Location, or Document. For this example, we will enable all macros within Excel (Note: You may want to consult your IT Department for their Macro Policy on Microsoft Office Documents.)
- Enable macros within Excel:
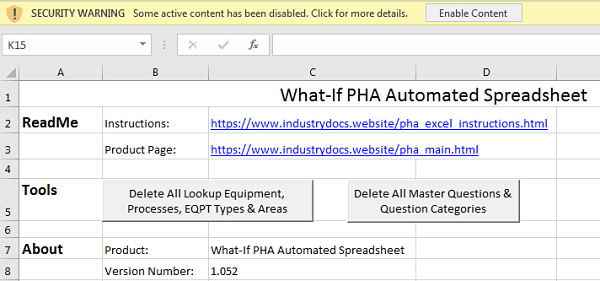
- Open the spreadsheet, you will receive a security warning regarding active content that has been disabled, and click the "Enable Content" button as shown below:
- Enable macros within Excel:
- Important Note: Drop-down lists are used throughout the workbook. Cells with drop-down lists do not support manual entry of new values. The drop-down lists are bound to tables. New values must be added via the respective lookup table. For example, the 3 right-hand columns in the Equipment table (EQPT Type, Area, and Process) have drop-down lists. New values, not already present within the drop-down lists, must be added via the respective table (EQPT Types, EQPT Areas, or Processes) as shown in the next step. Cells without drop-down lists support manual edits and new values.
- Define Site, Process, and Equipment Specific Information.
View and edit this information within the Lookup Tables worksheet. Data within the Lookup Tables worksheet may be directly edited. Important Note: Rows may be added by right-clicking on a table cell and choosing Insert->Table Rows Above. Rows may be deleted by selecting a range of rows, right-clicking and choosing Delete->Table Rows. Edits performed within the Lookup Tables worksheet are cascaded to the Master Question Table worksheet. Note: Table columns must not be deleted. Table structures and column headings must not be changed as this will break the underlying VBA automation code.
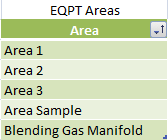
- Define the site Areas:
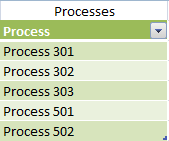
- Define the Processes:
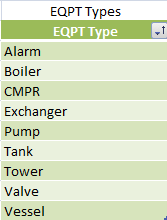
- Define the Equipment Types:
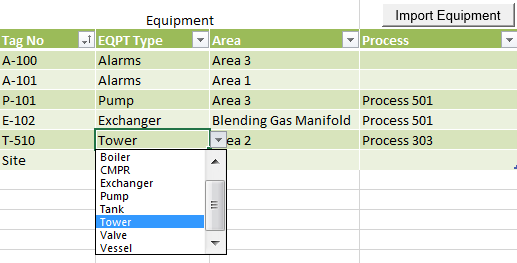
- Define the Equipment Tags and associate them with their respective Equipment Types, Areas, and Processes. You may freely enter whatever data you would like for the Equipment Tag No. The Equipment Type, Area, and Process entries untilize drop-down lists that reflect the data of their respective tables.
- Easily import the above information from steps 1 thru 4 via the "Import Equipment" button shown in the previous Step 4. The Import Equipment screen allows a range of 4 columns containing: Tag No, EQPT Type, Area, and Process to be copied from another spreadsheet. Clicking the "Import Equipment" button displays the following screen:

- Define the site Areas:
- Review What-If Question Information.
The What-If PHA Spreadsheet is pre-loaded with 100+ sample questions for the chemical and process industries.
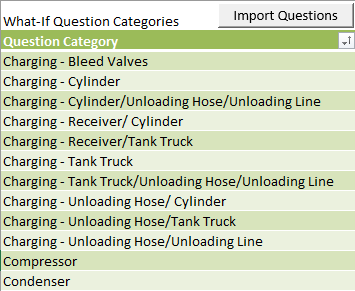
- Review Question Categories:
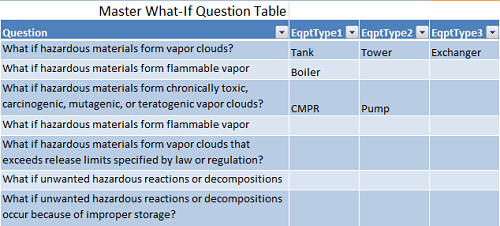
- Review Master Question List::

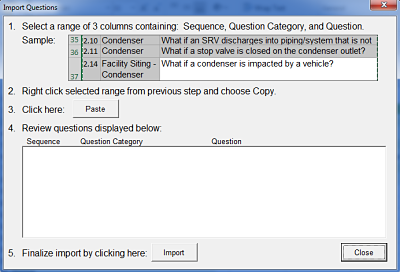
- Easily import the above information from steps 1 thru 2 via the "Import Questions" button shown in the previous Step 1. The Import Questions screen allows a range of 3 columns containing: Sequence, Question, and Question Category to be copied from another spreadsheet. Clicking the "Import Questions" button displays the following screen::
- Assign questions to specific Equipment Types:
- Review Question Categories:
- Review/Customize Risk Matrix and Associated Charts.
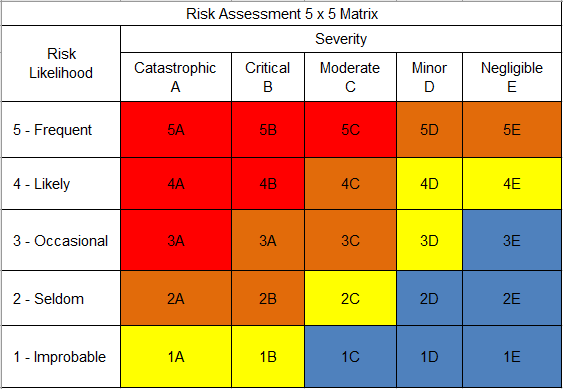
- The Default Risk Assessment Matrix is 5x5, and it may be customized for different dimensions and matrix values. This chart is purely informational and may be edited without concern for rendering worksheet logic inoperative. It is located in the Matrix worksheet and appears as follows:
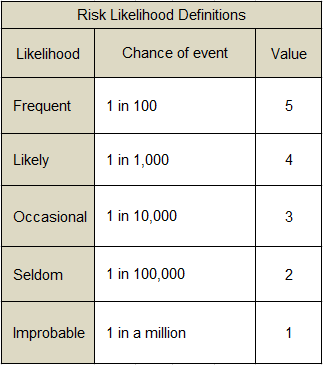
- A Risk Likelihood Definitions sample chart is located in the Matrix worksheet. This chart is purely informational and may be edited without concern for rendering worksheet logic inoperative:
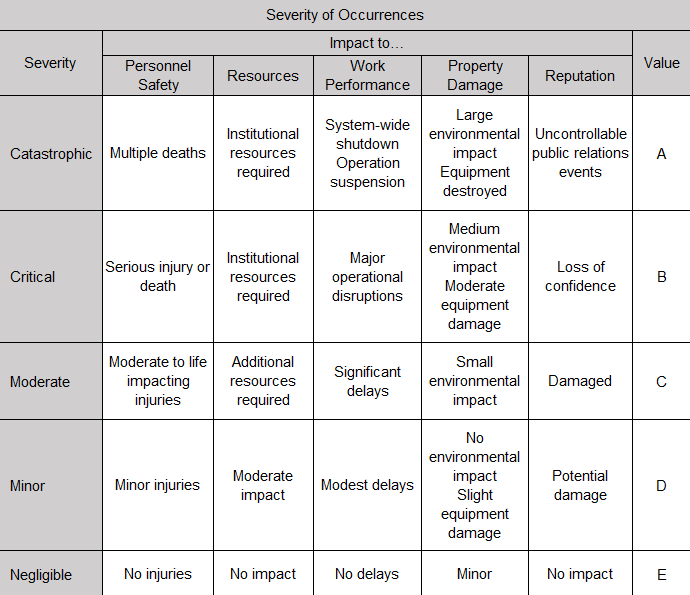
- Sample Severity meanings are displayed in this chart located in the Matrix worksheet. This chart is purely informational and may be edited without concern for rendering worksheet logic inoperative:
- A sample chart of Risk Assessment values and their meanings is located in the Matrix worksheet as shown below. The following chart may be edited to fit your What-If model; however, Excel Named Ranges are defined on the cells in the Assessment Values column and these Named Ranges are referenced within the formula for Risk calculation located in the Risk cell of the hidden "Template" worksheet. You may modify the text within the Meaning or Accountable Organizations columns without concern for rendering worksheet logic inoperative:

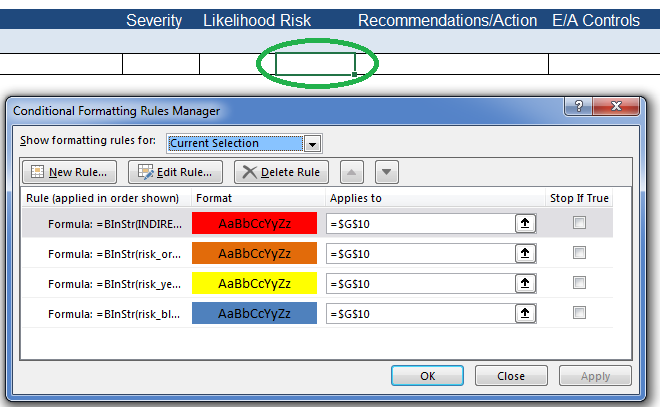
- When editing the Risk Matrix dimensions and values, it may be necessary to update the formula and the dynamic color formatting for the Risk cell in the hidden Template worksheet. The dynamic color coding of the Risk cell is achieved through conditional formatting as shown in the following sample from the Matrix sheet:
- The Default Risk Assessment Matrix is 5x5, and it may be customized for different dimensions and matrix values. This chart is purely informational and may be edited without concern for rendering worksheet logic inoperative. It is located in the Matrix worksheet and appears as follows:
- Filter, Select, and Copy Questions to a New or Existing What-If.
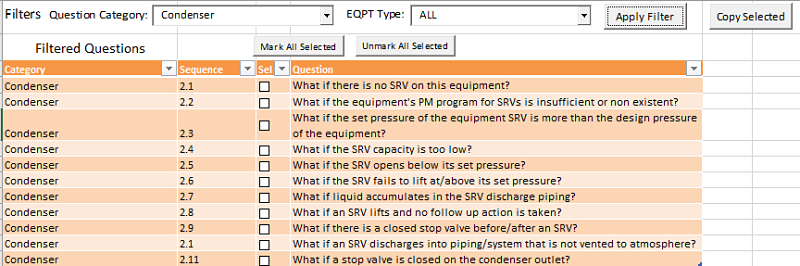
- The Select Questions sheet has a filter mechanism whereby the user may choose "ALL" or specific Question Categories and EQPT Types. Choose the filter conditions and click the Apply Filter button to display the matching Questions. Mark the Sel column checkbox for desired Questions and click the Copy To button. A sample from the Select Questions sheet is shown below:
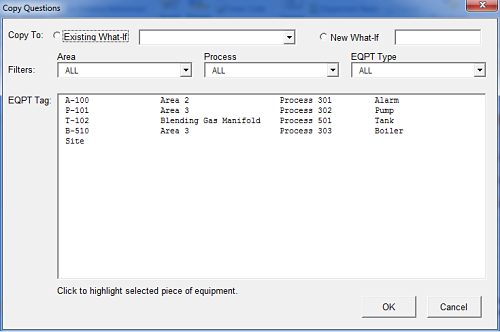
- A Copy Questions screen is triggered by the previous step when the user selected Questions and clicked the Copy To button. Now, the user may choose an Existing or New What-If Name and an EQPT Tag for which to apply the previously selected questions. Selecting an EQPT Tag is simplified by filters for Area, Process, and EQPT Type. After locating the desired EQPT Tag, the user clicks to highlight it and then clicks OK to finalize the copy process. A sample Copy Questions screen is shown below:
- After choosing OK in the previous step, a What-If worksheet is created or updated as shown below:
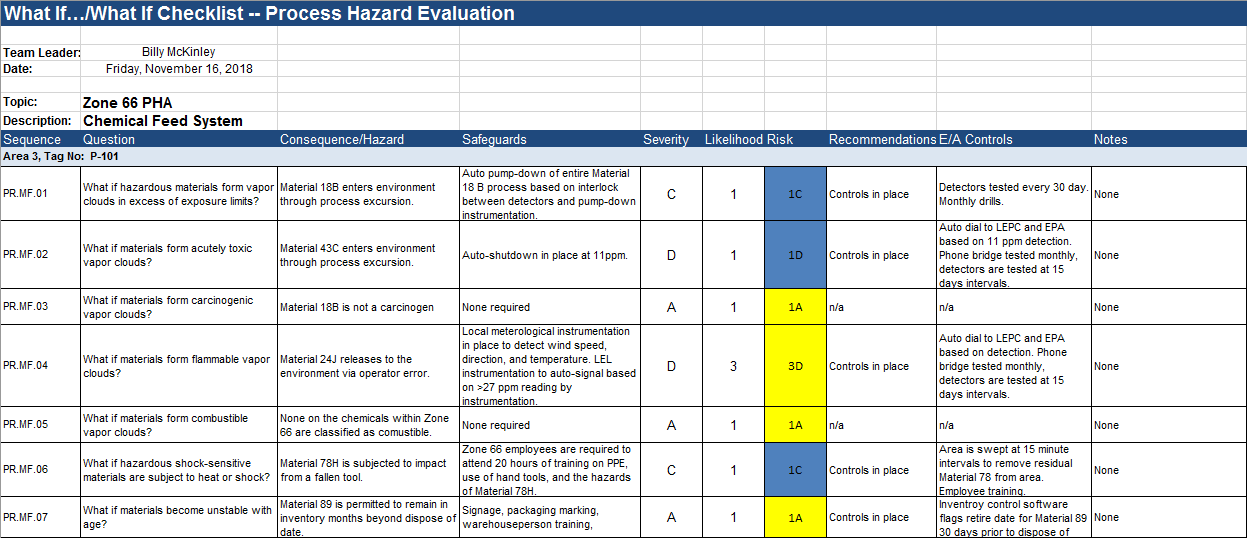
- Risk Matrix value dropdown lists and formulas are automatically inserted into the Severity, Likelihood, and Risk columns as shown below:

- The Select Questions sheet has a filter mechanism whereby the user may choose "ALL" or specific Question Categories and EQPT Types. Choose the filter conditions and click the Apply Filter button to display the matching Questions. Mark the Sel column checkbox for desired Questions and click the Copy To button. A sample from the Select Questions sheet is shown below:
- How to Customize the Risk Matrix
What-If PHA Resources
- Increase your PHA study productivity with our automated spreadsheet and the included PHA resources.
- Develop a thorough, orderly, systematic approach for identifying, evaluating, and controlling potential hazards within a process involving potentially hazardous chemicals.
- Ammonia Process Question Set suitable for Refrigeration Systems and OSHA PSM and EPA Risk Management. Question set provided in Microsoft Excel Format.